


I wanted to make an easy dessert for the kids that tasted like something from a real bakery, and this recipe delivered! If you’ve ever wanted a fun alternative to cake or cupcake, this easy holiday themed layered cake in a jar recipe is it. It’s so fluffy, delicious, and super sweet – just like you’d get from a professional shop.
It’s also a really easy recipe to modify for any occasion. Mine were holiday themed, but I am seriously considering this as an alternative to birthday cake at our next party. So much easier and much less mess!
This recipe seriously tastes like something you’d get from a bakery – particularly the grocery store kind. It uses grocery store style icing and the cake recipe comes out fluffy and moist.
What Kind of Jar Should I Use for This Cake?
I actually used plastic cups because they were for the kids, but you can use almost anything. Clear glasses look great, or small mason jars. Just make sure it’s clear so you can see the cake layers! You also want to look for something that has a wide enough opening that you can get a fork or spoon into.
Could I Make This Recipe With Boxed Cake Mix/Store Bought Frosting?
You could, but it won’t taste quite the same. Follow the recipe instructions on the box to make, bake, and cool your cake. Then just layer the cake and icing like we did with our homemade version!
Is the Cake Baked in a Jar?
No, this recipe calls for pre-baking your cake and then assembling it inside a glass or jar.
Grinch Themed Cake in a Jar

If you want a different idea you can also make a Grinch themed cake in a jar instead. I made it by layering green cake and icing, and then topping it with green sprinkles. The heart is a sugar cookie that I dipped in red icing and then dipped in red sprinkles.
What Ingredients Do I Need for This Cake in a Jar Recipe?
For the cake you’ll need your typical cake ingredients: 3 and 2/3 cups of flour, salt, 2 teaspoons of baking powder, 3/4 teaspoon of baking soda, 1 1/2 cups of softened butter (unsalted), 2 cups of sugar, 2 large eggs and 3 egg yolks (so 5 eggs total), 1 tablespoon of vanilla extract, and 1 1/2 cups of whipping cream.
The icing calls for 1 cup of softened butter, 1 cup of Crisco (shortening), 2 tablespoons of water, about 8 cups of confectioner’s sugar, 1 tablespoon of vanilla extract, and approximately 1/4 cup of heavy cream. (You can adjust the icing sugar and whipping cream to get the consistency you need.)
If you want to add colour you’ll also need food colouring. Sprinkles and other decorations are optional.
Tools Required
For this recipe you’ll want to have an electric mixer, or at least a handheld one, with both a paddle and whisk attachment. It’s not required to sift the dry ingredients but it makes a big difference, so a sifter is really good to have.
You also need a cake pan or baking pan with sides. To assemble the cake cups, mason jars, plastic cups, or clear glasses are required.
How to Make This Easy Holiday Themed Layered Cake in a Jar Recipe – Step by Step
1. Sift Together the Flour, Baking Soda, Baking Powder, and Salt

I like to add some of the flour, sift that, and then add in some more flour with the other ingredients so they all mix together. The reason we sift is to make sure everything is soft and airy – sifting adds air into the ingredients. It also helps remove any lumps from the final product.
2. Cream together the Butter and Sugar

You’ll want the paddle attachment on your electric mixer. Make sure your butter is room temperature and soft before you start. You can start your mixer on low then slowly increase the speed so it whips up nicely.
3. Add the Vanilla and Eggs

Once it’s mixed, add the vanilla and eggs and blend thoroughly. It will look curdled.
4. Add in the Flour Mixture

With the mixer on low, slowly pour or scoop in your flour mixture. Make sure you don’t dump too much at once or it will go everywhere. Mix it just until it’s combined.
5. Add the Cream

Add in the heavy cream and whip it on high speed. It should end up being quite fluffy and creamy.
Optional – Add food colouring

There’s a few ways you can do this. You can add the food coloruing to the mixer, or mix it in by hand. For multiple colours, sperate your cake batter into bowls first and mix in the colouring.
6. Spread it Onto the Cake Pan

I used a large pan so the cake would be thin and I could do more layers. If you have a big pan it works better, but smaller cake pans can be OK too. It will really just change the size of the layers in your final product.
7. Bake at 325 degrees for about 25-30 minutes.

Add time if your cake is thicker, and check it after about 20 minutes if your cake is thin. The cake is done when a toothpick or cake tester inserted into the middle comes out clean.
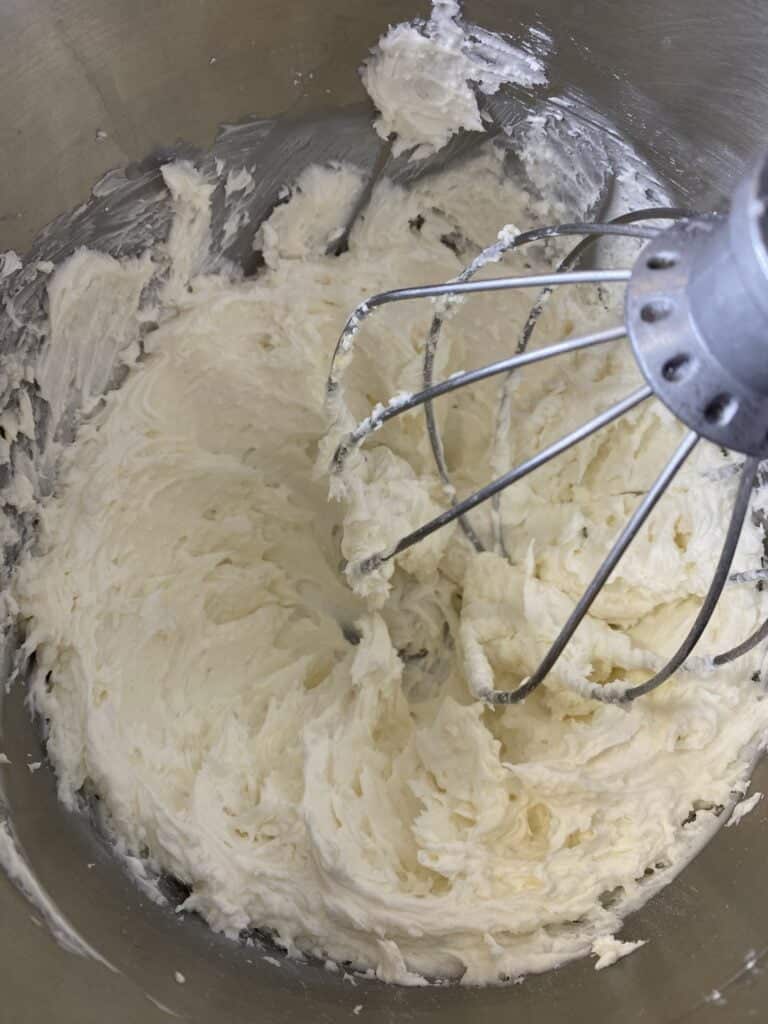
8. Make the Icing

First, add all the frosting ingredients to the bowl of your electric mixer. Make sure your butter and shortening are room temperature.
Whip using the whisk attachment on high until the frosting is light and fluffy. You can add more cream or confectioner’s sugar to change the consistency at this point.
Optional: Add food colouring (see instructions above)
If your cake isn’t ready you can put the icing the fridge until you need it.
8. Make Sure the Cake Cools Thoroughly

I pulled mine out of the pan and rested it on a cutting board. I had to cut the cake into 1/4s to make it easier to work with.
9. Assemble the Cake Cups

Using the cup as a guide, cut out a circle of cake. It’s ok if it’s a bit bigger than the opening, it will squish in. Press it to the bottom. Then add a layer of icing – I like mine to be equal (or almost) to the size of the cake, but you can add as much or little as you like.
Then cut a slightly larger circle and use it to press down the icing. Repeat until your jar or cup is full!
And You’re Done – This One is a Grinch Themed Cake in a Cup!

Holiday Themed Layered Cake in a Jar Recipe

This holiday themed layered cake in a jar recipe is perfect for Christmas entertaining, birthdays, or as a delicious dessert idea. It tastes just like it's from a bakery!
Ingredients
- 3 2/3 cups of flour
- 1/2 teaspoon salt
- 2 teaspoons baking powder
- 3/4 teaspoon of baking soda
- 1 1/2 cups of softened butter (unsalted)
- 2 cups of sugar
- 2 large eggs and 3 egg yolks (so 5 eggs total)
- 1 tablespoon of vanilla extract
- 1 1/2 cups of whipping cream
For the Icing
- 1 cup of butter (softened)
- 1 cup of Crisco (or your favourite shortening brand)
- 2 tablespoons of water
- 1 tablespoon of vanilla extract
- 1/4 cup of heavy cream
Instructions
- Preheat the oven to 325 degrees.
- Sift together the flour, baking soda, baking powder, and salt.
- Using an electric mixer with the paddle attachment, cream together the butter and sugar.
- Add in the vanilla extract and eggs. Mix well - it will look curdled.
- Slowly add the flour mixture until just combined.
- Add in whipping cream and whip until the mixture is light and fluffy.
- Optional: Add food colouring.
- Spread your cake batter onto a greased sheet or cake pan.
- While cake bakes, make your icing. Add all ingredients to an electric mixer with the whisk attachment. Whip together until smooth and fluffy. Optional: Add food colouring.
- Cook cake thoroughly.
- Assemble cake cups by layering cake and icing until the cup is full.
- Top with sprinkles, sugar cookie cutouts, or anything you'd like!
Notes
- Sifting adds air to the mixture and makes it even lighter.
- Don't overbake your cake!
- When making the frosting, adding more confectioner's sugar will thicken it, and adding more cream will make it thinner. Also, make sure you whip it good!
- Crisco is the secret to making the icing taste like it's from the grocery store.
- Wilton and other gel food colouring brands will give you a better colour than liquid food colouring.
- Baking margarine can be used instead of butter.
Recommended Products
As an Amazon Associate and member of other affiliate programs, I earn from qualifying purchases.
-
 Wilton Easy Layers Sheet Cake Pan, 2-Piece Set, Rectangle Steel Sheet Pan, Charcoal
 -
Wilton Icing Colors 12-Piece Gel Food Coloring Set
-
PARTY BARGAINS 12 oz Plastic Cups - (100 Count) Clear Disposable Tumbler, Premium Quality & Heavy-duty Plastic Drinking Cups for Juice, Soda, Ice Coffee, & Tea - BPA Free


0 Comments